Posted: 8-6-2025 Written by Charm
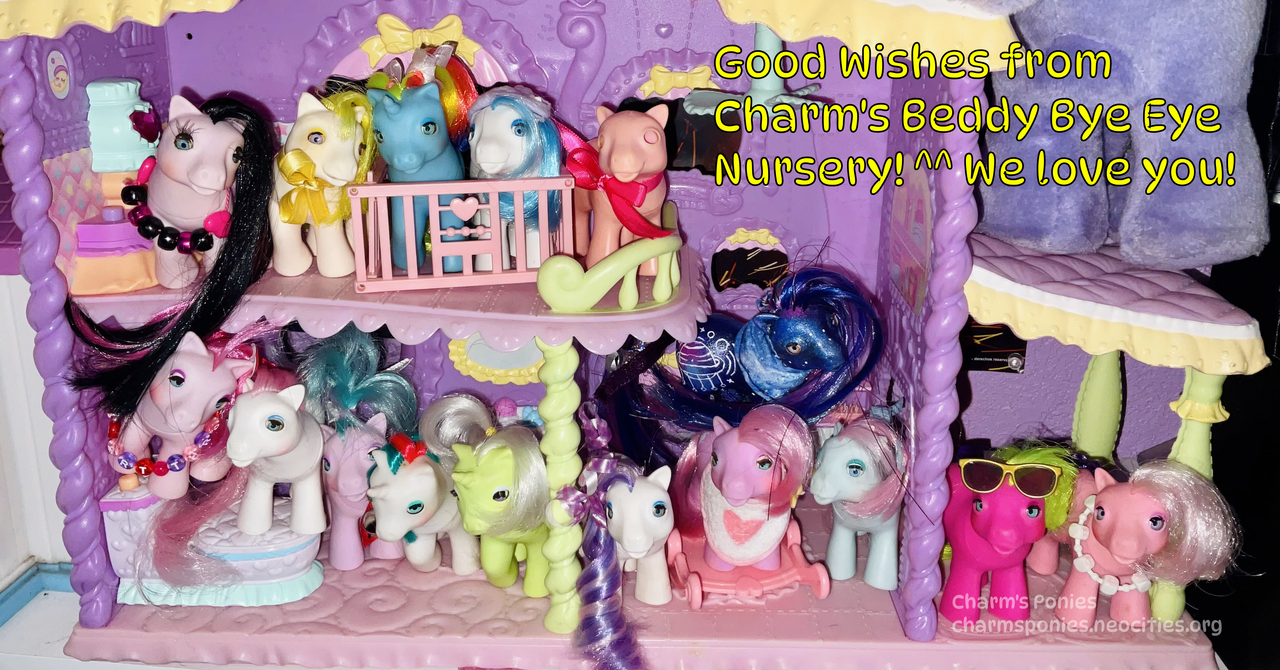
It's no secret that I LOVE BEDDY BYE EYES! They're some of my most favorite ponies ever, and my goal is to build a huge army of them. I believe they have a certain cuteness about them, especially if you are looking at the unicorn or pegasus pose headon... their cuteness is to DIE FOR, awww... Sure, most people think they're creepy... With realistic, blinking follow me eyes that might look a little uncanny, the added fact that those eyes can rust, turning a bloodshot scary red... No wonder people tend to dislike these little ponies. Ulitmately, it's a blessing because it means Beddy Bye Eyes are rather cheap, and therefore easier to get your hands on.
But unfortunately for our little Beddy bye eye friends, because they aren't very well liked, it is Not Easy to find resources on how to repair, restore, or customize them with their eyes in tact. In fact, it's very likely that if you try to google how to take beddy bye eyes out to fix them, you will instead come across those tutorials of "How to remove bbes so you can sculpt over their faces and turn them into non beddy bye eyes", which means the person making the tutorial has no interest in keeping the eyes in good condition or replacing them afterwards... Those tutorials have their place and I completely understand not liking BBEs, but it still makes me a little sad, lol. "Aww, poor babies... No one loves you enough to make a tutorial for how to help your broken eyes :(" So today friends, I am here to change that.
Here are the topics we will be going over today:
1) Cleaning rusty Beddy Bye Eyes
2) Replacing missing Eye Lashes
3) Removing Beddy Bye Eyes
4) Beddy Bye Eye Mechanics (How it works, with insight on possible repairs)
5) Getting Beddy Bye Eyes back into the head
Let's get started!
To clean Beddy Bye Eyes that have rusted, you do not actually need to remove the eyes. You can clean the eyes while they are still in the head.
You will need: A small bowl to hold liquid in, white vinegar or your choice of rust remover (I use white vinegar because it is easy to access, cheap, and safe to use with pony plastic. It might not get rid of serious staining, so if you want to use a stronger rust remover, PLEASE test it first to make sure it doesn't damage the pony plastic. You always want to be careful with chemicals and ponies! Acetone is not safe for the plastic inside of the eyes.), and an old toothbrush.
Pour the white vinegar into the bowl, enough to submerge the eyes. Place the beddy bye pony's face into the white vinegar, and use the toothbrush to gently scrub the rust away, trying your best to avoid messing up her lashes. You may also want to let the head sit in the vinegar for a period of time if your rust is especially bad. Sometimes, a pony's eyes will be so badly rusted, that the eyes will be stained yellow even after the rust has been cleaned. I am not a perfectionist, so as long as the rust itself is gone I try not to fuss too much over a little staining since it is normal if the eyes are rusty for years.
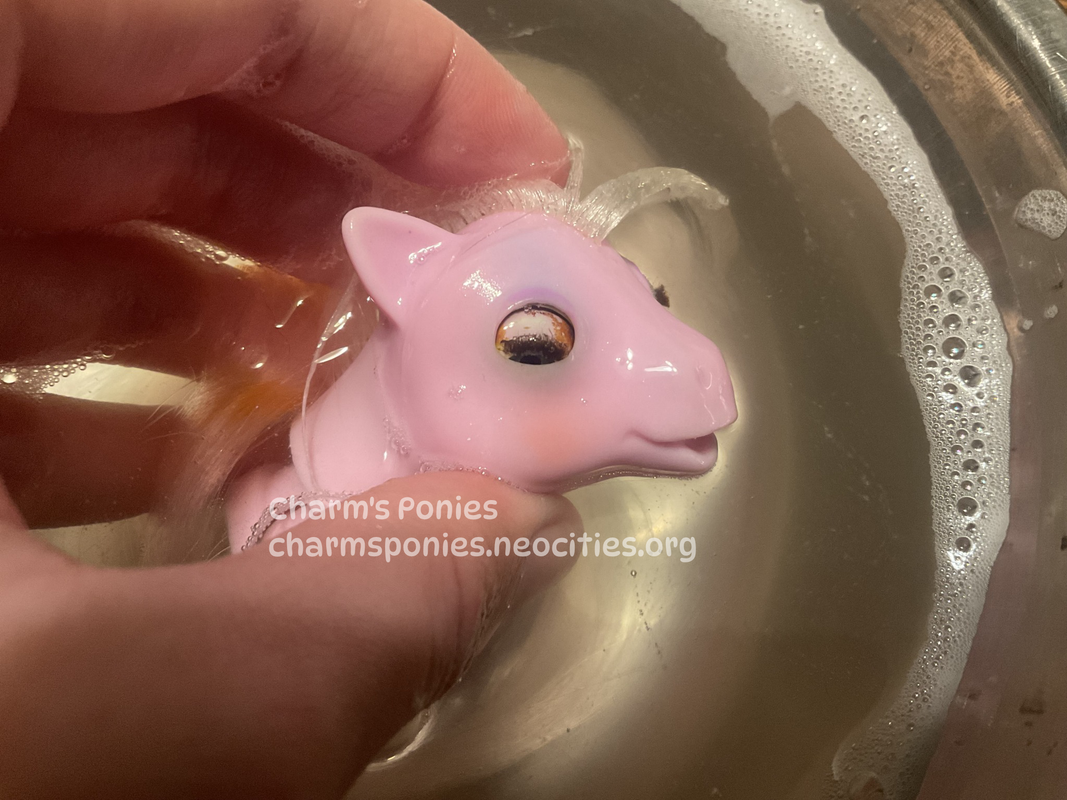
Another interesting phenomena I've noticed after cleaning a pony with vinegar, sometimes it will dry strangely in a way that stains the area surrounding her eyes a dark black color? Never fear if this happens, because it can easily be cleaned, just stick her into the vinegar again. To prevent her from drying this way, I like to get a small cloth and manually dry the eyes, which can help prevent it from drying strangely.
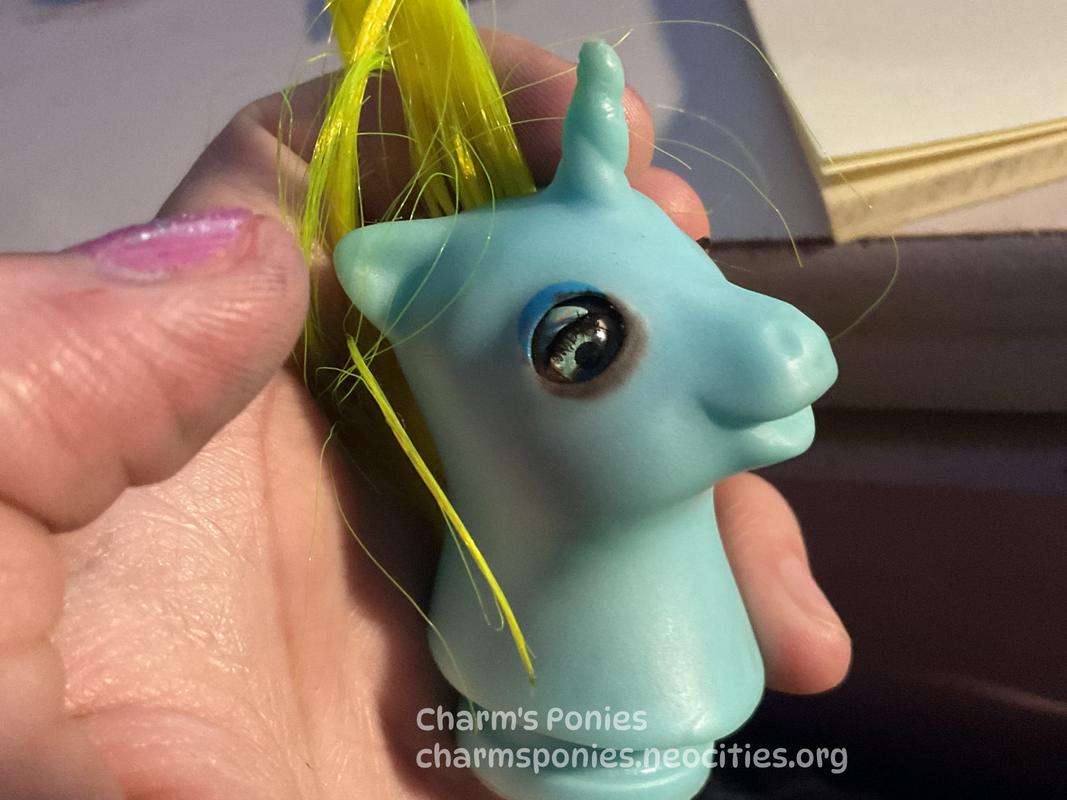
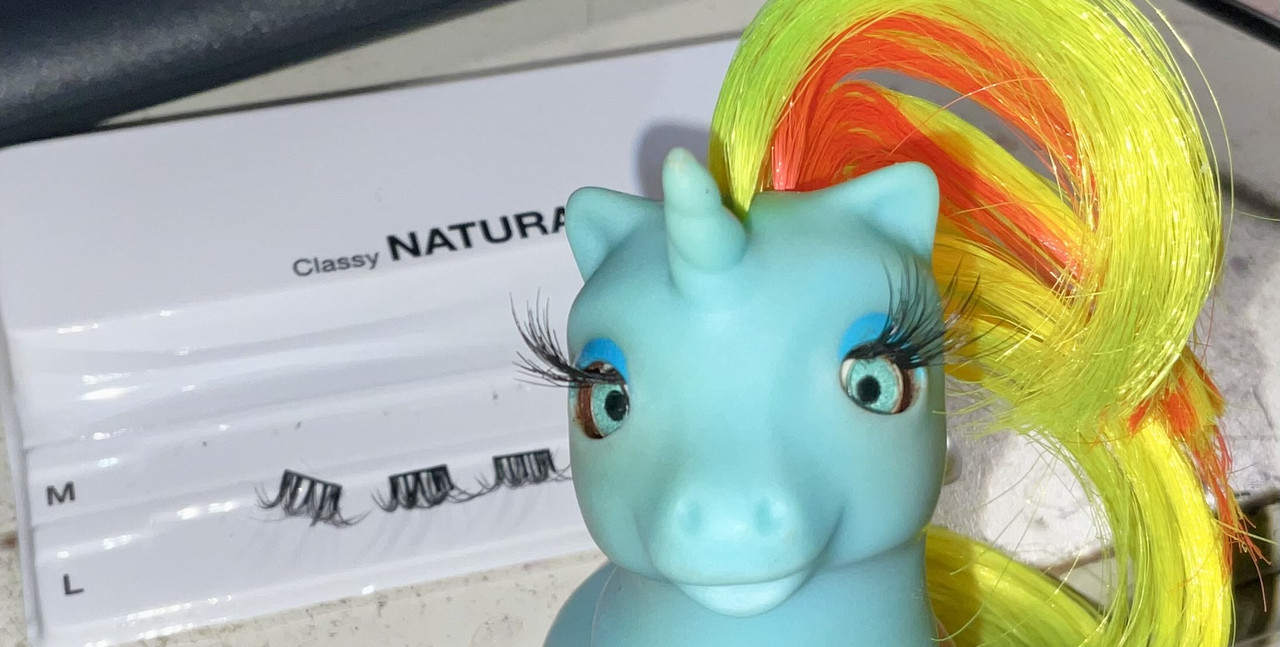
If you find yourself with a beddy bye eye that is missing its eyelashes (Why do kids even cut them off!?!?) This is easily replaced too. At a beauty store or even just your local walmart, look for fake eyelashes. I tend to go for the smallest ones I can find, just because that is easier than buying a bigger one and trying to cut it into the correct size. It is also useful if you can get the stick on ones so you do not have to hassle with glue. But once you get your fake eyelashes, use your fingers or some tweezers to position them correctly over your baby pony's eyelash line. The is a hole where the eyelashes go. Using a toothpick you can press the ends of the eyelashes into the eye, and then you can apply some glue to the toothpick and press that in too if you want it to be nice and secure. I don't know if you can find eyelashes that look like the originals, but these longer lashes are rather cute!
This tutorial assumes that you do NOT want to damage the pony's face or the eyes themselves. Some people open the beddy bye eye head and use a thin object to push the eyes out through the front of the face, which is a viable method for getting them removed. This works for sure, but also carries the risk of damaging the pony's face mold. Beddy Bye Eyes are prone to having damaged faces if too much force is applied to where the plastic rips.
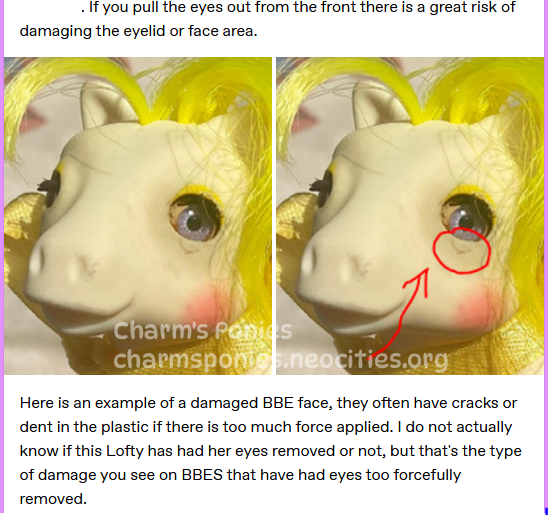
The way that I have removed eyes in a way that prevents damage to the front of the face is by doing the opposite: Removing the eyes from the inside.
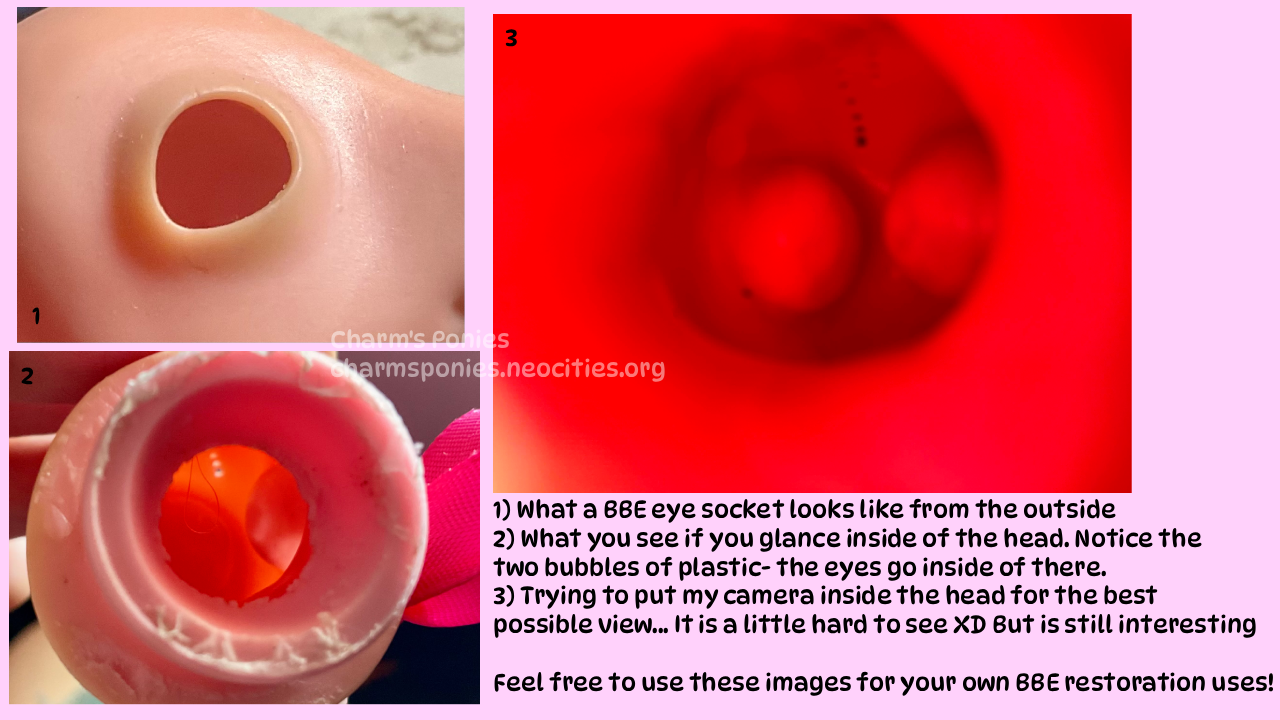
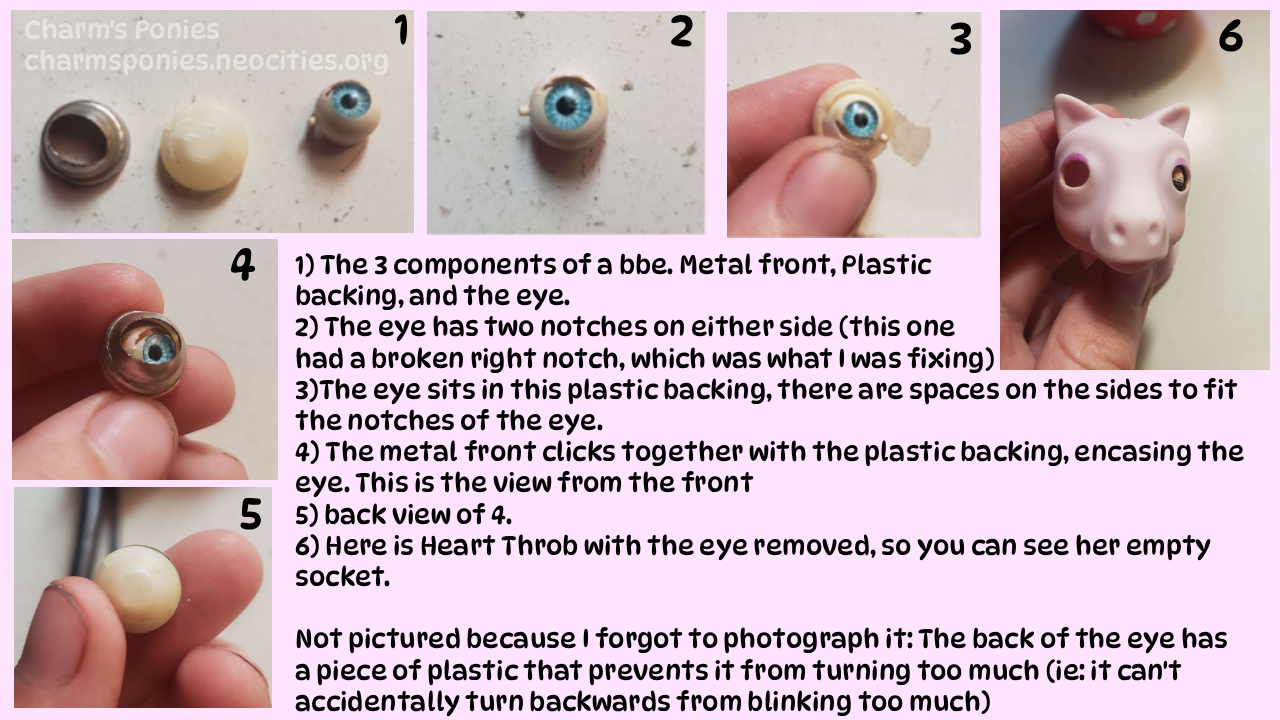
First we will remove her head. Here are some example photos of what the eye sockets look like on the beddy bye eye mold: There is a little pocket for the eyes to sit in molded into the plastic, so if you look inside of the head you can see two little plastic bubbles.
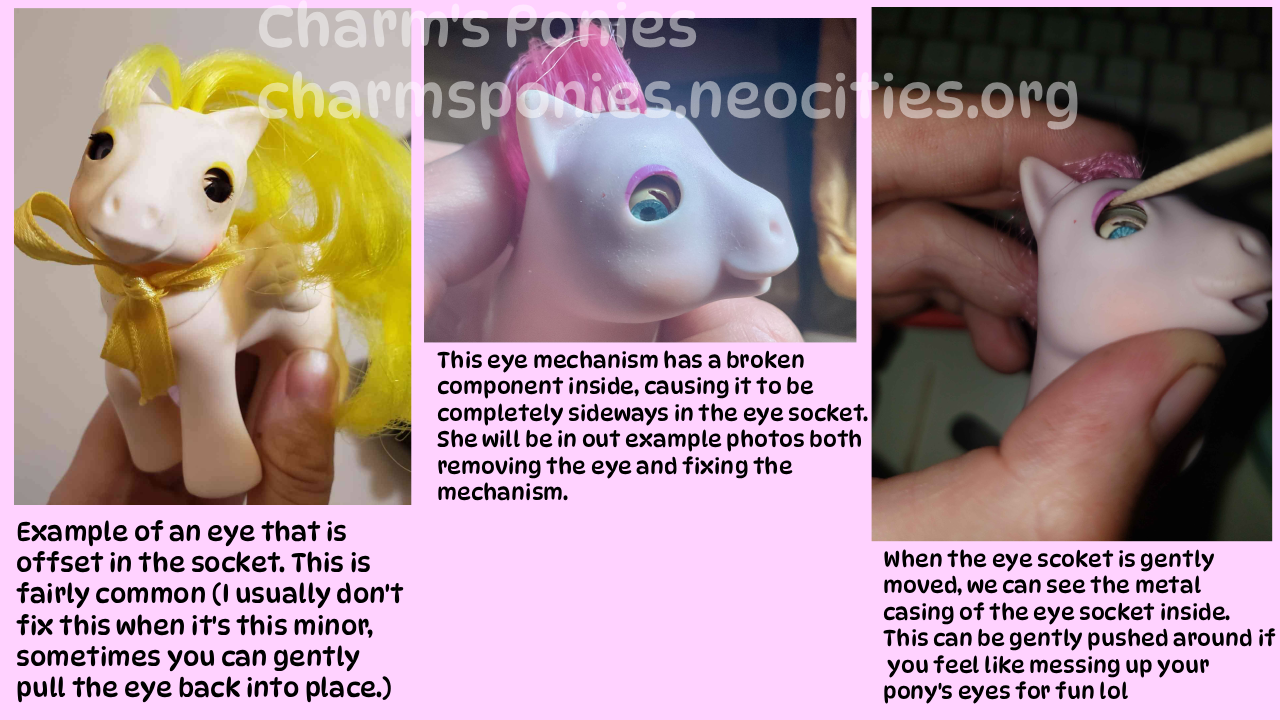
For our example images, I will be using the little Baby Heart Throb my friend Millie gifted me who eventually became Black-Heart Throb. You can see that her eye was completely sideways in the skull. Now, it is actually not too uncommon for an eye to be a little bit offset in the socket, giving it a sort of cute crosseyed look. I have a few other ponies with this issue, as shown below. But Heart Throb's issue was bad enough that I wanted to completely fix the eye mechanism and therefore remove it entirely. In a photo below, you can see the metal casing of the eye mechanism visible from outside the body when her eyesocket was gently pushed forward.
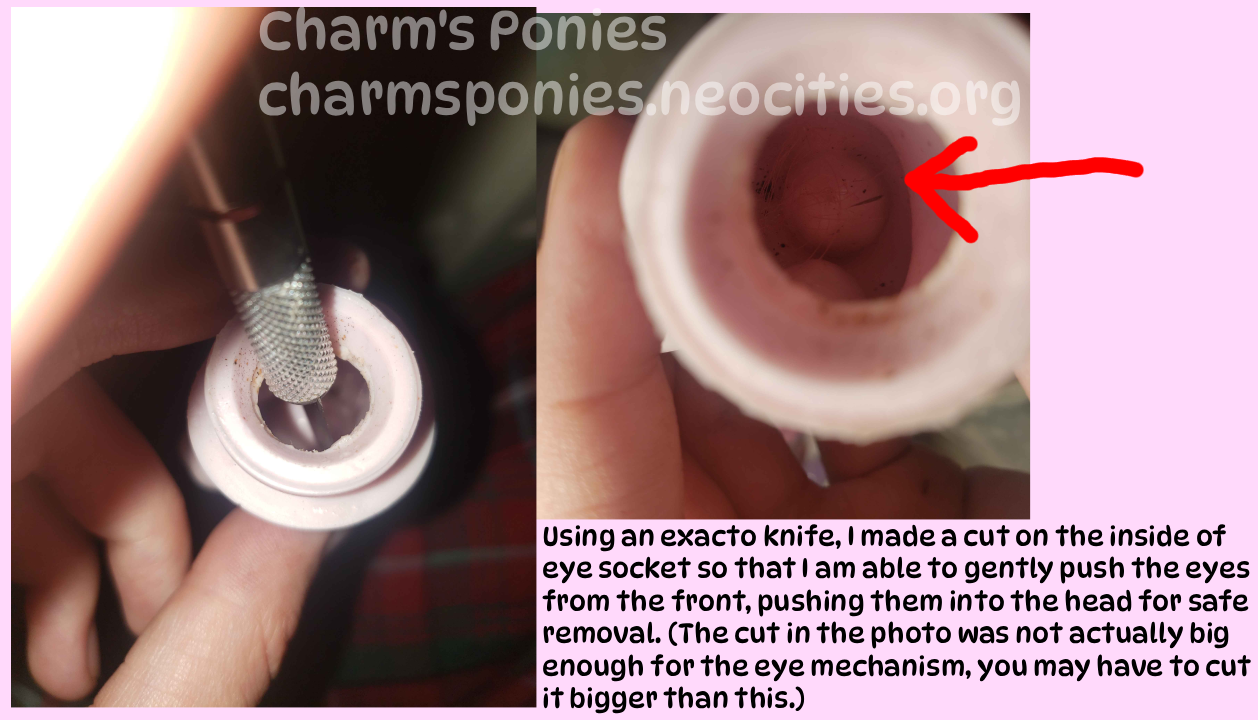
So let's remove the damaged eye. First I took off her head and I used an xacto blade to make a cut on the plastic where the eye socket is (Reminder to always be careful when using sharp blades, restoring ponies is not a hobby suitable for young children. After I cut a slit in the plastic that is good enough, I take a thin object like a pencil and GENTLY press it against the eye from the outside, pushing it through the cut
Great, the eye should hopefully be removed now! Let's take a look at the eye mechanism:
Beddy Bye Eyes have 3 parts to them: The eye itself, which should have two small notches on either side (You will notice the eye in the photo had one of the notches broken off... That was the source of our lopsided eye problem!) a metal piece that goes on the front of the eye, and a plastic bit that goes on the back. The little notches on the eye are meant to sit in the casing perfectly, allowing the eye to swivel in place (This is how the blinking mechanism works.) There is also a piece of plastic in the back of the eye itself that acts as a blocker to keep the eye from spinning in place too much, it can't turn completely around for example. It is similar to the way blinking eyes work in puppets and animatronics! Though of course this works through gravity instead of using any type of lever to move the eye, and it is the eye itself that is moving rather than an eyelid piece. The metal and plastic pieces snap together easily.
Depending on the issue with your eye, you may have to use your brains to figure out a good solution as to how to fix it. If your eye is missing the notches in the side like my eye was, here is how I remedied it:
Using a pin, I drilled a hole into the side of the eye where the notch was meant to go. Take your time, be gentle but firm and press the pin into the side of the eye and make a swiveling motion until there is a hole. Then I took wire and super glue, glueing the wire into the eye to create a new notch. Simply trim the wire down to size and place the casing onto it.
Once you're done with that, you can put the eye back into the head. This was the hardest part for me, as the space inside of a BBE head is rather small so your fingers will not be able to simply reach inside and push the eye back through the inside of the socket. This takes some trial and error, but you can use the thin tool you used to push the eye out to push it back in. For me, I drop the eye into the head and use my pencil eraser to try and gently push it back into the socket. Even then it can be a little hard to get it positioned right (I have accidentally put the eyes in backwards so that the metalcasing was showing) But if you're gentle with the front of the face, once the eye is in the pocket of plastic making up the plastic you can use a toothpick or something to gently push and pull it into place.
And there you have it! All of my tips to making your beddy bye eyes' eyes happy again! Feel free to contact me if you have any questions (@charmsponies on tumblr, the mlptp and the mlp arena) or if you have any other beddy bye eye tips you'd like to contribute to this page! Good luck on your restorations!